Latest Posts
BBBC Farm Report #3
The hops are coming in pretty well. Cascade is coming along the best, followed by Tettanang and Columbus. Centennial is taking it’s time, but it is growing.
On the other side of the garden, I planted some jalapeños and cucumbers. If they come up (it’s been very rainy here all week), they will become hopped pickles.
- Lots of Cascade
- Cascade
- Cascade
- Centennial
- Tettanang
- Columbus
🍻
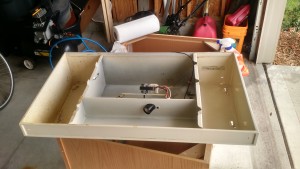
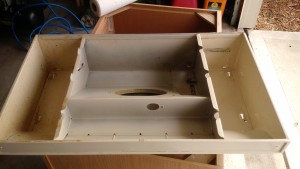
Old Range Hood Turned Into a Brewery Exhaust Hood
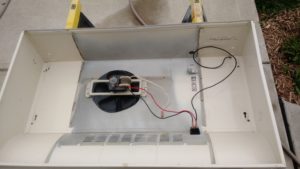
Since I brew in my basement, it’s pretty important to exhaust the vapor from the wort outside the house. When it’s any temperature that isn’t between 50 and 65 degrees, opening a window isn’t the greatest way.
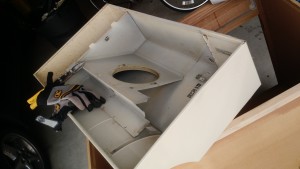
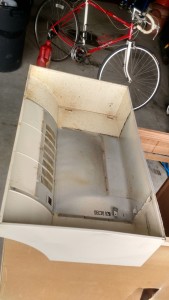
A friend was remodeling his kitchen and gave me a sink base cabinet (which will make it’s way down into the brewery) and his old range hood. the range hood was one that recirculates the air (as opposed to exhausting it), so it’s actually kinda useless. But with some modifications, it can exhaust the air.
One note about this is that safety is paramount. Sharp metal edges can cut like a broken glass carboy.
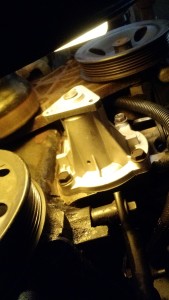
After this, I went to pull my truck back into the garage and noticed a bunch of coolant under my truck and trailing into the garage. The water pump blew.
Cheers!
Brettanomyces Saison using 50 West Dregs
A few months ago, I bought a pair of bottles of 50 West’s first (I think) bottle release, Brett is my Copilot. I was fermenting a saison at the time, and pulled a gallon aside and pitched the bottle dregs in it. Looks like this happened on April 8, because Twitter says I posted the pic below on April 9th at 7:47 AM… which was probably after I arrived at work the following morning.
I went far down the #homebrew rabbit hole by pitching some of the Brett from a @FiftyWestBrew to a Saison. pic.twitter.com/KbHLlzTROr
— Andrew Rohne 🍺🏃🍕 (@HamBrew807) April 9, 2015
The initial recipe is below:
Recipe Details
| Batch Size | Boil Time | IBU | SRM | Est. OG | Est. FG | ABV |
|---|---|---|---|---|---|---|
| 4.5 gal | 90 min | 31.2 IBUs | 8.0 SRM | 1.058 | 1.004 | 7.1 % |
| Actuals | 1.051 | 1.01 | 5.4 % | |||
Style Details
| Name | Cat. | OG Range | FG Range | IBU | SRM | Carb | ABV |
|---|---|---|---|---|---|---|---|
| Saison | 16 C | 1.048 - 1.065 | 1.002 - 1.012 | 20 - 35 | 5 - 14 | 2.3 - 2.9 | 5 - 7 % |
Fermentables
| Name | Amount | % |
|---|---|---|
| Pale Ale Malt 2-Row (Briess) | 8.5 lbs | 79.07 |
| Wheat Malt, Pale (Weyermann) | 12 oz | 6.98 |
| Caramunich Malt | 8 oz | 4.65 |
| Sugar, Table (Sucrose) | 1 lbs | 9.3 |
Hops
| Name | Amount | Time | Use | Form | Alpha % |
|---|---|---|---|---|---|
| Tettnang | 0.75 oz | 60 min | Boil | Pellet | 4.5 |
| Tettnang | 1 oz | 15 min | Boil | Pellet | 4.5 |
| Amarillo | 0.5 oz | 15 min | Boil | Pellet | 9.2 |
Miscs
| Name | Amount | Time | Use | Type |
|---|---|---|---|---|
| Irish Moss | 0.25 tsp | 15 min | Boil | Fining |
Yeast
| Name | Lab | Attenuation | Temperature |
|---|---|---|---|
| French Saison (3711) | Wyeast Labs | 80% | 65°F - 77°F |
Mash
| Step | Temperature | Time |
|---|---|---|
| Mash In | 148°F | 75 min |
Download
| Download this recipe's BeerXML file |
I essentially let it ferment out (it was about a 4 gallon batch after a little disaster). I then racked a gallon to another carboy and swirled the dregs from the bottle and pitched it into the carboy.
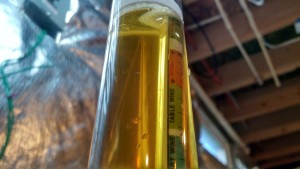
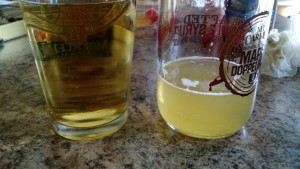
It’s been a while (six weeks?) and I tried some.
It has some tartness and a lot more mouthfeel. It’s getting bottled today and the yeast/brett mix will be saved for another.
Cheers!
Raspberry Pi Fermentation Temp Controller III: Server APIs
This is the optional part of the Raspberry Pi Fermentation Controller, but it’s the part that I used to roll into the Brewery IoT page.
There are three PHP scripts that run on the server:
- Index.php – collects data
- getRows.php – lists data from the database
- getLast.php – gets the last temperature entered in the database
There are also two prerequisites:
- A pre-shared .pem key on the server. This should match the one on the Raspberry Pi.
- A MySQL table (I’ve called it FermChamber, but if you know SQL, you can change it) with two columns: TimeStamp (datetime) and Temp (float).
With that out of the way…
Index.php – Data Collection
The data collection script is below. It expects post form data with a JSON formatted file. If you’ve followed the first post in this series, you’re good.
Note that you will need to change the code to use your correct server, username, password, and database.
getRows.php – List of Data (for the bar graph)
This script gets the temperatures in the database for the line chart.
getLast.php – Get Last Temperature Reading
This is just a simple script to get the last temperature in the database. This is for display on the dial gauge.
One of the next parts in this will be the code to display on the page.
Cheers!
Raspberry Pi Fermentation Controller II: Power
I started on building a Raspberry Pi based fermentation controller. This is a device that turns my chest freezer on and off based on the temperature of the freezer and what the Raspberry Pi thinks (which is essentially what I programmed it to do).
This is one of those posts that gets a disclaimer: BE CAREFUL IF YOU DO SOMETHING LIKE THIS. You can get killed by touching the wrong thing here, and it will hurt then entire time you’re dying. People will not be able to see your bones as you flash from electrocution. Marv wouldn’t have lived. I’m not an expert or licensed or even qualified to do this (and since I’m doing this, does that make me a Redneck)? Your mileage may vary, of course.
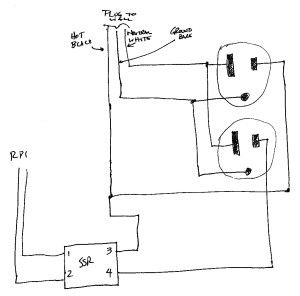
There are really only two major parts to this, a solid-state relay (SSR) and an outlet. I removed the little tab connecting the two hot-sides of the outlet together to allow for one to be on always and the other to be on just when the SSR says it should be. This is all wired to a plug (I used an old computer cord that was conveniently colored on the inside. A diagram of the connections is below.
Some notes:
- This should not be hard-wired into the electrical system. It is probably code to have things like this be easily able to be disconnected, and the plug allows for that. Also, intelligence dictates that things like this should be able to be unplugged should some failure happen down the line (and since electricity is involved, those failures can be spectacular and bright… and deadly).
- One could make the case for needing a fuse in this. I don’t think it needs one. However, this is protected by both a circuit breaker (as is everything in the house) and a GFCI (because the plug it will use is near a sink). I’m truthfully not concerned, but I don’t know if I’m right to be unconcerned.
- Solid state relays should ALWAYS have heat sinks, and thermal grease between the sink and the SSR.
- SSRs are rated. It needs to be able to handle at least enough current as the freezer, although I recommend double. My freezer claims 2.5 amps, my SSR is 40 amps. Should be safe.
- Test everything using a safe tester and test method. For outlets, the $5 3-prong tester like I use is adequate and safe – much much safer than a multimeter. Truthfully, every homeowner should have one of these (and when my house was built, I used this little tester on every single outlet).
- Everything should be in a box, in case something happens. Said box should be waterproof as much as reasonably possible.
Pictures are below.
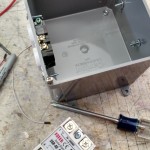
- Near beginning. Added an outlet to the side.
- My cat, Mocha, wants me to brew a mocha stout, I guess.
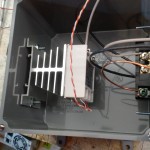
- Solid-State Relay in place.
- Testing. This is a more dangerous part because I don’t have the covers in place.
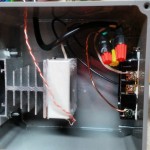
- Internal finished view.
- External finished. Complete with some stickers!
- Side. The lower outlet is on the relay, the upper outlet is always on.
The only problem I ran into was that the $3 Chinese solid-state relay is bad. The switched outlet is on regardless of the input (although I’m still testing things, so not 100% sure if I’m right, but I’m ordering like 3 more… after all, they’re like $3 and out of the last two I purchased, one is probably bad). I’ve tested (with the unit unplugged) across the SSR terminals and did not find a short, and across the two hot sides of the receptacle and did not find a short. But in the case of the SSR, it may not display a short to my tester because it is a much lower voltage than the outlet.
EDIT
The relay was probably fine. It appears that there is a minimum current required to turn on/off the SSR, and the 1/4 watt tester was not enough of a load. I replaced the relay (with one of the FIVE I bought), and plugged the freezer into it, despite the new one showing the same signs as the old one. The freezer did not turn on when I powered-on the Raspberry Pi (I had turned it off to plug it into the box’s unswitched outlet). I made a quick administrative code edit, and it worked.
Cheers!
Removing that $%@! Chlorine
I live in an area with great water for pale beers, and great water in general… except for the chlorine.
My previous way to prepare beer was to use a 1/2″ hose from my refrigerator dispenser to a fermenting bucket. Then, I had to carry the buckets to the basement brewery to use. Last time, I did this the night before, which was good from the standpoint that the filter in the fridge is crap and had my wife’s ultra-sensitive palate complaining of the chlorine flavor. Sitting overnight allows the chlorine to leave the water.
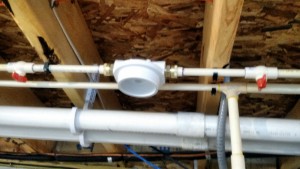
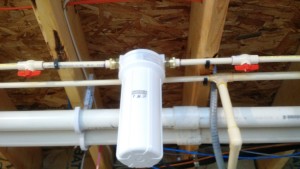
Not one to want to carry heavy buckets of water around (especially since I’ve recently been diagnosed with a major back injury) and wanting to brew again, I decided to fix that problem once and for all. Enter the whole-house water filter.
After running water through the plumbing for several minutes and bleeding the air out of a few other faucets, I handed my wife a glass of tap water and asked her to drink. She looks at me, smiles, and says “nothing”.
Cheers!
Raspberry Pi Fermentation Temp Controller I: cron jobs 1 and 2
This is the first of a handful of posts about getting my fermentation temperature controller up and running. As I indicated before, there are three python scripts on the Raspberry Pi that make this all work.
For those that don’t know, the Raspberry Pi is a small computer that is about the footprint of a credit card. It isn’t very powerful, but you don’t need power to do this temperature control. One thing you DO need for this is called GPIO, or General Purpose Input/Output. These can be used as switches in code. There are many ways to use these, but the easiest (in my opinion) is using Python.
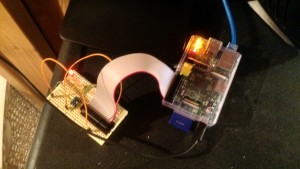
My current setup is with the Raspberry Pi connected to a breadboard, which is a device that allows solder-free connections (solder is somewhat permanent and soldering parts to a PCB is a lot of work). In the image above, the ribbon cable connects to all the GPIO pins on the Raspberry Pi, and specific pins are being used to connect to a temperature sensor and to a light emitting diode (LED).
The two parts of code are to check the temperature and determine if the temperature has gone too low (the Emergency Stop Script), and the other is to send the temperature to a server (the API Send Script).
Emergency Stop Script
This is the check script. It checks the temperature and shuts off the GPIO output if the temperature is at or below 32. Two things to note on this, one is that if this temperature sensor is just in the chamber, the beer will probably be a degree or two warmer (unless it stays at 32 for a while). The other thing to note is that if you are making eisbock, you should probably change or disable this script.
The script above should be set in the cron manager (crontab -e) to run every minute:
*/1 * * * * sudo python /home/pi/source/pyTemp/pyECheck.py > /home/pi/source/pyTemp/pyECheck.log
The code above has it run every minute (the */1). The path to the script on my Raspberry Pi is /home/pi/source/pyTemp/pyECheck.py, and the output log file is /home/pi/source/pyTemp/pyECheck.log. Note the use of sudo on this script – or “superuser do”. This runs the script as a fully privileged user, which is required to use the GPIO pins.
API Send Script
This is the script to send the data to a server. There are a few things that need to be changed. One is that you need to generate an encryption key that will be used on the Raspberry Pi and the web server to encrypt and decrypt the data. This is almost overkill, but it ensures that it cannot be screwed with. The other thing that needs to be changed is the server address. These are both at the top of the file.
This script should not be run every minute (that’s what we’d call overkill). I use every 10 minutes, although it could be less often.
*/10 * * * * sudo python /home/pi/source/pyTemp/pyTemp.py > /home/pi/source/pyTemp/pyTemp.log
The next part of this will be either the actual Raspberry Pi connections or the PHP server backend. But either way, likely both are coming within the next few weeks although regular programming may be interrupted by a brew day report.
Cheers!
Hops and Fermentation Controllers
I spent most of the week in Atlantic City. The running injury ruined the potential run on the boardwalk (when you’re a runner, you do these things and look forward to them). The beer is nothing particularly special (although I may have under-rated Tun Tavern’s Irish Red), but I paid for very little of what I drank. And the conference I was part of organizing went very well.
Dry Hopped Bud Light Update
I’ve made it through seven of these. Cascade, Zythos, Green Bullet, Amarillo, Columbus, Mosaic, and Galaxy. I’m sticking to 3-4 per day, and I’m using the unhopped Bud Light to reset my palate. I’ve noticed that Amarillo, Columbus, Mosaic, and Galaxy were all much more flavorful. It may be just mis-measurement in hopping, though.
I’ve been thinking of doing something like this for malt. The flavor of hops is pretty important in some styles (like IPAs), but will traditionally take a back seat to malt in other styles (like damn near every other style, to widely varying degrees).
Homegrown Hops Update
I got a text from my wife on the day I was to leave Atlantic City noting that one of our kids noticed that the hops seemed taller. They indeed grew over the week.
Fermentation Controller Update
I worked a lot on the fermentation controller. The Brewery IoT page now shows real temperatures (it’s my basement’s temperature, but it’s real). I’ll post more about this sometime, but the short version is that it is 100% Raspberry Pi based. There are three scripts that run in cron (scheduled tasks in Linux) – a script that sends the data to my offsite webserver (the one that is serving this page), a script that checks the temperature and turns the solid-state relay on and off, and a third ’emergency stop’ script that ensures that the freezer doesn’t fall to 32 or below (which would be disabled if I ever decided to brew an eisbock).
I’m itching to brew another beer. I’m considering another IPA (shocker there!), and then almost immediately brewing a Marzen style to prepare for September. Late in the year, I have been thinking about a maple bock to brew. I still haven’t made any improvements to the setup except some hose clamps.
Cheers!
Dry Hopped Bud Light!
I know some local bloggers did a “hop class” where it looked like they dry hopped Bud Light. Since I couldn’t go, I filed the idea in my mind somewhere. At one point while drinking at the LHBS, I brought up the idea, where we immediately started making fun of Bud Light. I later Googled it and found a very descriptive post from Bertus Brewery and decided to do the experiment myself.
The short of it is to add 2-4 pellets of hops to Bud Light, let it sit for 3 days, cold crash the hops, and then enjoy.
I had in my inventory on the day before I started typing this some Amarillo, Cascade, Northern Brewer, and Tettanang (good thing Paradise didn’t have those!). I dropped by Paradise and bought an armload more…
I need some Bud Light! Dry hopping experiments. pic.twitter.com/1In1ENNDT2
— Andrew Rohne 🍺🏃🍕 (@HamBrew807) May 9, 2015
In the list (in case the glare is in the way) with the notes from the pack:
- 7C’s – floral and citrus aroma
- Mosaic – an artistic assortment of enticing aromas
- Simcoe – unique and piney
- Equinox – Aroma – citrus, tropical fruit, floral and herbal characteristics………
- Horizon – floral and spicy
- UK Fuggle – Aroma – pleasant and hoppy (ahem… Let’s not use “hoppy” to describe hops! All hops are “hoppy”!!!)
- Columbus – Pungent
- Galena – Aroma – citrus
- Zythos – no notes (it’s a mystery!)
- NZ Green Bullet – Subtle spicyness
- El Dorado – nothing on the pack, but from Midwest Supplies – bright tropical fruit flavors and aromas of pear, watermelon, and stone fruit
- Soriache Ace – Unique tones of lemon and dill
- Australian Galaxy – Citrus and passionfruit
And the ones I already have:
- Amarillo – Floral, tropical, and citrus (lemon, orange and grapefruit) characteristics
- Cascade – Medium intense floral, citrus and grapefruit tones
- Northern Brewer – Medium intensity, pine and mint characteristics
- Tettanang – Noble aroma that is pleasant and spicy
I’m looking forward to this!
Cheers!
BBBC Farm Report #2
- Columbus bines getting trained to the twine.
- Trellis. Sort of temporary. It’s only 8 feet tall, so it could use to be taller.
- Cascade on the left, Tettanang on the right.
- Columbus on the left, Centennial on the right.
Cheers!


